Introduction: -
The environment-related builds can be used to use different base URLs for the network requests (test data in the Staging environment app build, production data in the Prod environment app build).
As an example, In the first step, we will create an app called envSetup with Staging and Prod environment-based variants, and set a unique package name/bundle id, app name, and app icon for them, which will enable the installation of different app versions on the same device (each app's package name or bundle id must be unique in Android or iOS).
We'll add React Native Config as a dependency in the following step. This library's main goal is to make it easier for us to store environment/flavor-related constants in straightforward.env files and read their values in our Javascript coding. Injection of the particular.env files into the apps is also possible during CI-to-build processes.
In the end, we’ll have the following 4 app variants for both platforms (Android/IOS) with different package names/bundle id, app names, and app icon
- envSetup-Staging, envSetup-Prod as envSetup in Ios
- Staging, Prod in Android
How to setup env in react native app:-
- let’s initialize the React Native app using the React Native CLI:
npx react-native init envSetup- Install React Native Config libraries.
npm i react-native-config- Install pod for iOS
cd ios && pod install- Create 3 env files in the project root directory
.env

.env.prod

.env.staging
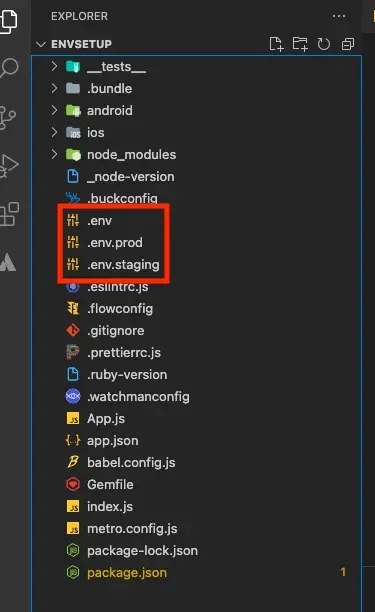
In the env files, we must add different base URLs for the network requests.
In Android:-
After the project has opened, we should look for the applicationId key in the android/app/build.gradle file under the defaultConfig block to check our initial package name on Android:
android {
 defaultConfig {
    applicationId "com.envSetup"
    ..
 }
}
Inside of the android/app/build.gradle file, We should define our available flavor dimensions below the buildTypes block then match every product flavor we want with a flavor dimension within the productFlavors block:
android {
 buildTypes {
   debug {
     ...
   }
   release {
     ...
   }
 }
 flavorDimensions "default"

 productFlavors {
   prod {
       minSdkVersion rootProject.ext.minSdkVersion
       applicationId 'com.envsetup'
       targetSdkVersion rootProject.ext.targetSdkVersion
       resValue "string", "build_config_package", "com.envsetup"
   }
   staging {
      minSdkVersion rootProject.ext.minSdkVersion
      applicationId 'com.envsetup.staging'
      targetSdkVersion rootProject.ext.targetSdkVersion
      resValue "string", "build_config_package", "com.envsetup"
   }
 }
}
After adding productFlavors, we should add project.ext.envConfigFiles block on top of the android/app/build.gradle file
apply plugin: "com.android.application"
import com.android.build.OutputFile
import org.apache.tools.ant.taskdefs.condition.Os


project.ext.envConfigFiles = [
  prodDebug: ".env.prod",
  prodRelease: ".env.prod",
  stagingRelease: ".env.staging",
  stagingDebug: ".env.staging"
]
apply from: project(':react-native-config').projectDir.getPath() + "/dotenv.gradle"
We must add Script to execute the Android project with build variations after adding project.ext.envConfigFiles. The script will be included inside the package.json file from the main project(envSetup).
"scripts": {
   "android:prod": "react-native run-android --variant=prodDebug --appId
     com.envsetup",
   "android:prod-release": "react-native run-android --variant=prodRelease --appId
     com.envsetup",
   "android:staging-release": "react-native run-android --variant=stagingRelease
     --appId com.envsetup.staging",
   "android:staging": "react-native run-android --variant=stagingDebug --appId
     com.envsetup.staging",
}
In Ios: -
Open the project(envSetup.xcworkspace) in Xcode, In the Project sidebar (on the left), select the envSetup project.
ios/envSetup.xcworkspace In the Project/Targets, Create new targets envSetup-staging.

In the envSetup-staging targets change the bundle identifier(envSetup-staging bundle identifier different from the envSetup bundle identifier)
envSetup target:-

In the project section, select the Info tab (in the middle), and we can check the configurations under the Configurations block. ( In debug & release have an envSetup, envSetup-staging Configurations set )
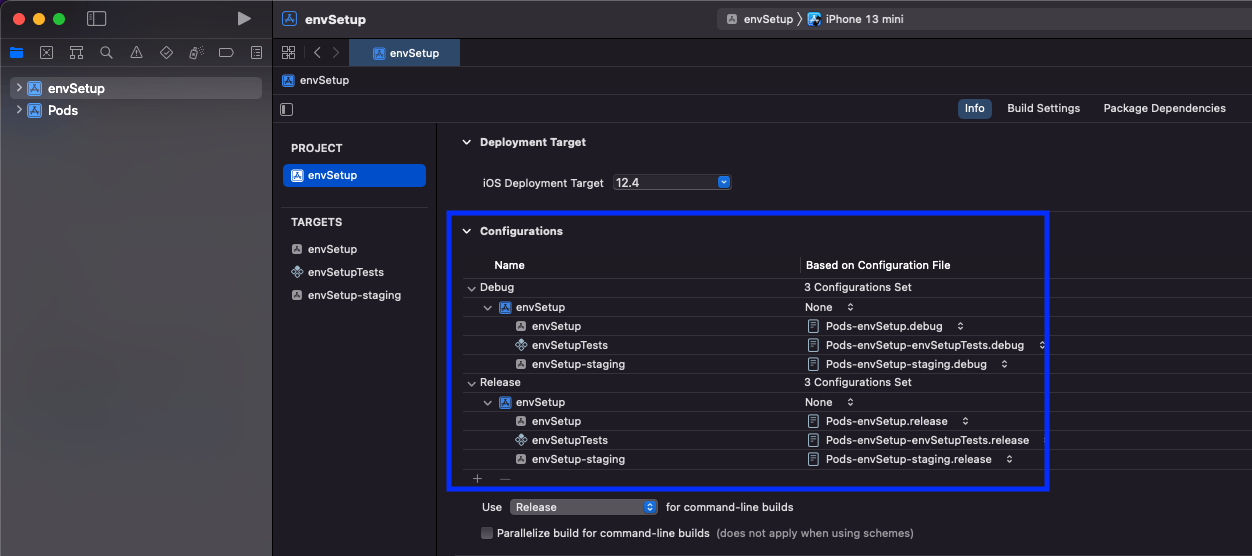
We must click on the Product / Schemes / Manage Schemes... menu to access the Manage Schemes window and view the available schemes.
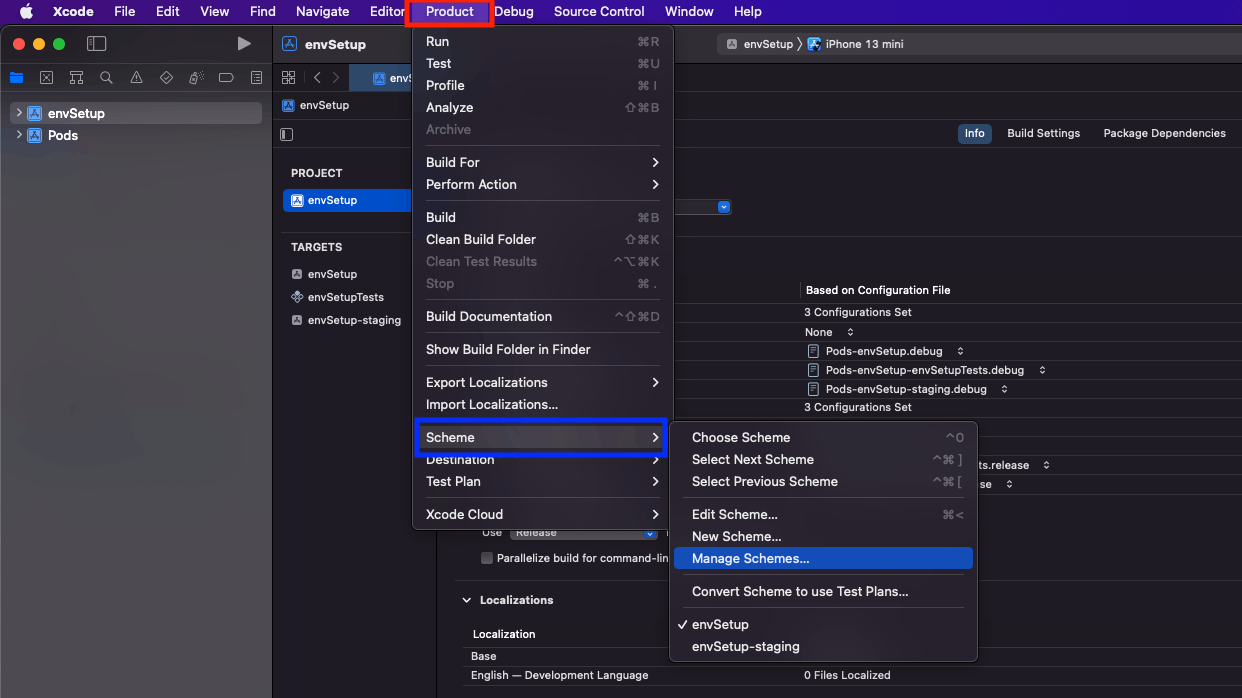
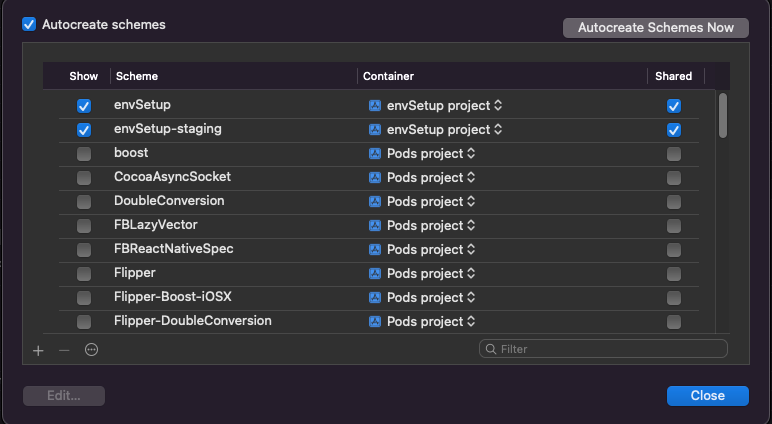
After creating the schema and target, we must click on the Product / Schemes / Edit Schemes… menu to access the Edit Schemes window.
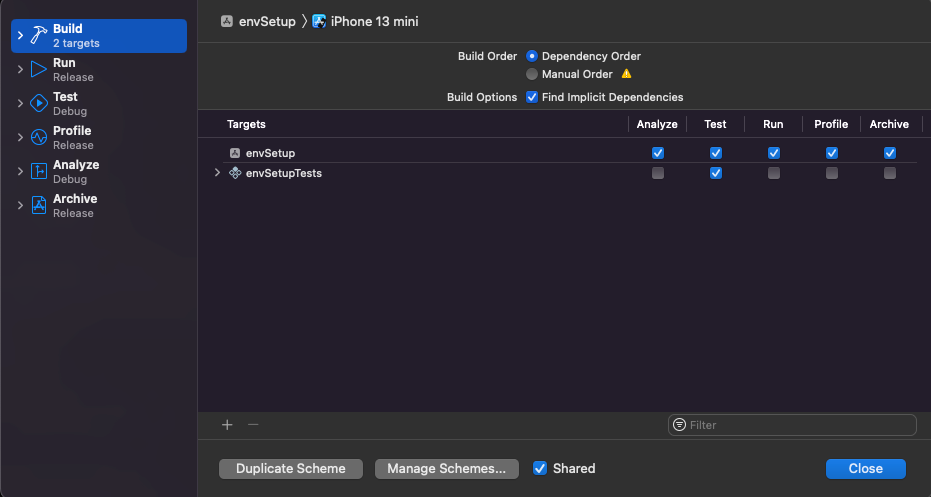
Setup for Prod:-
Click on the envSetup, Select envSetup target for Prod variants setup.
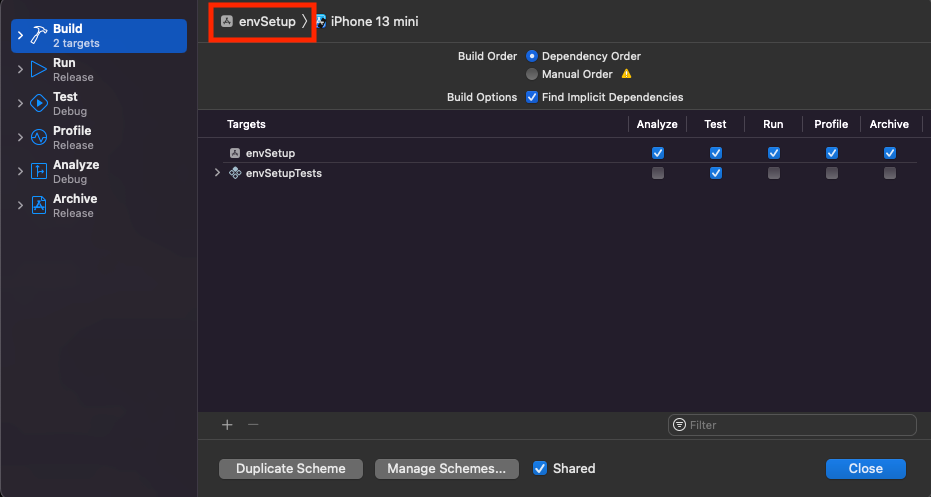

Click on Build (left side in the menu)

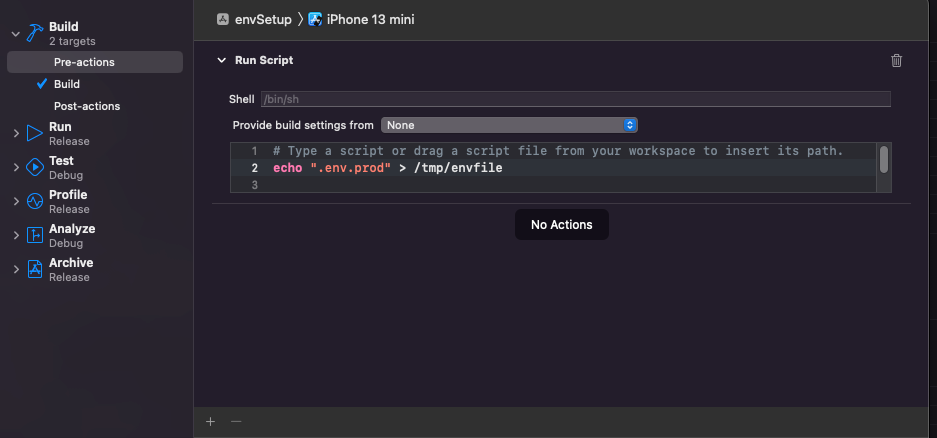
Select Pre-actions and add run script for Prod.
echo ".env.prod" > /tmp/envfile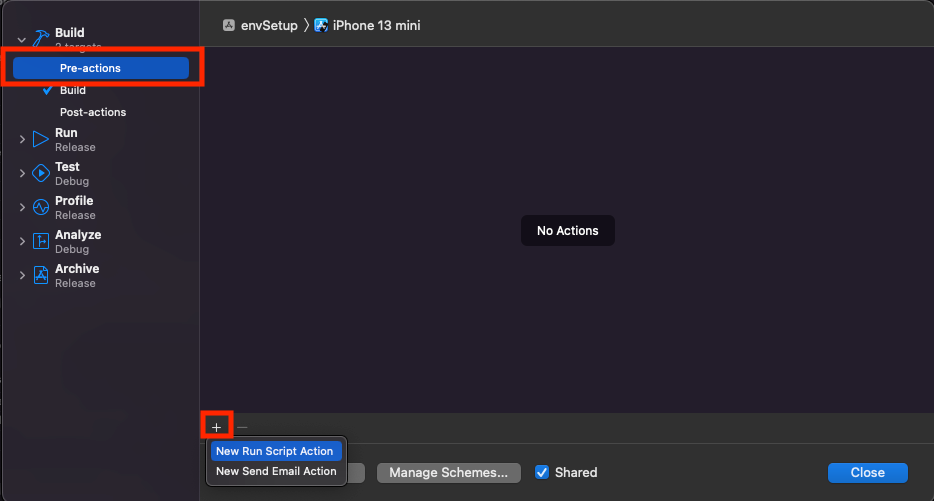
Setup for Staging:-
Click on the envSetup, Select envSetup-staging target for Staging variants setup.
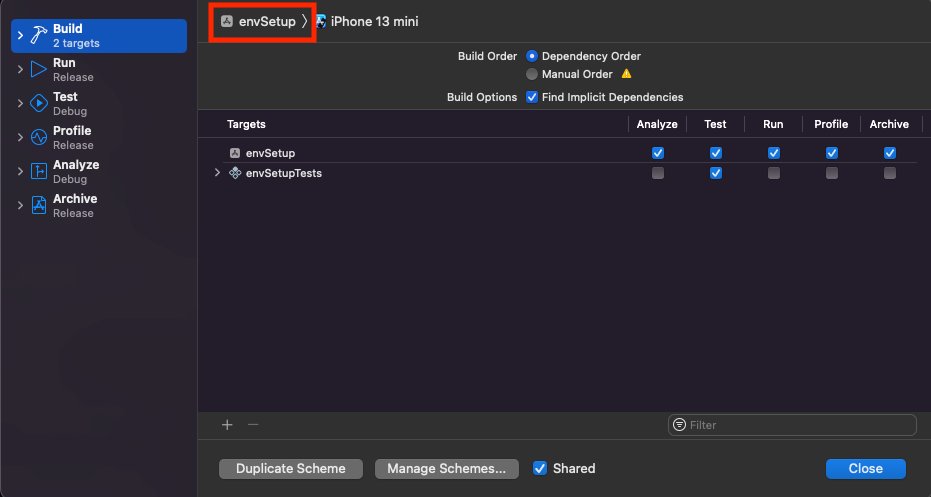

Click on Build (left side in the menu)

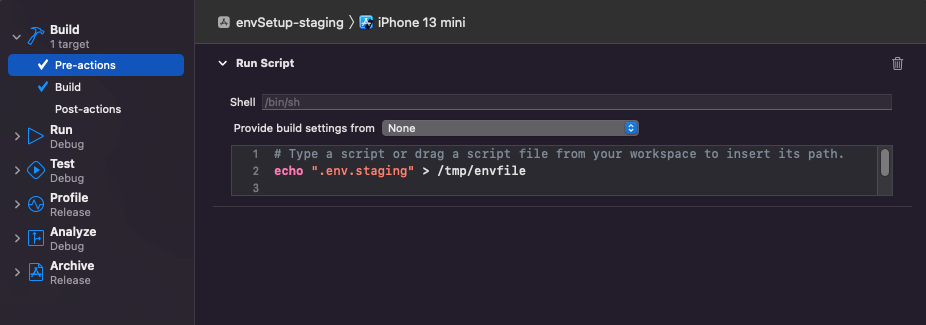
Select Pre-actions and add run script for Staging
echo ".env.staging" > /tmp/envfile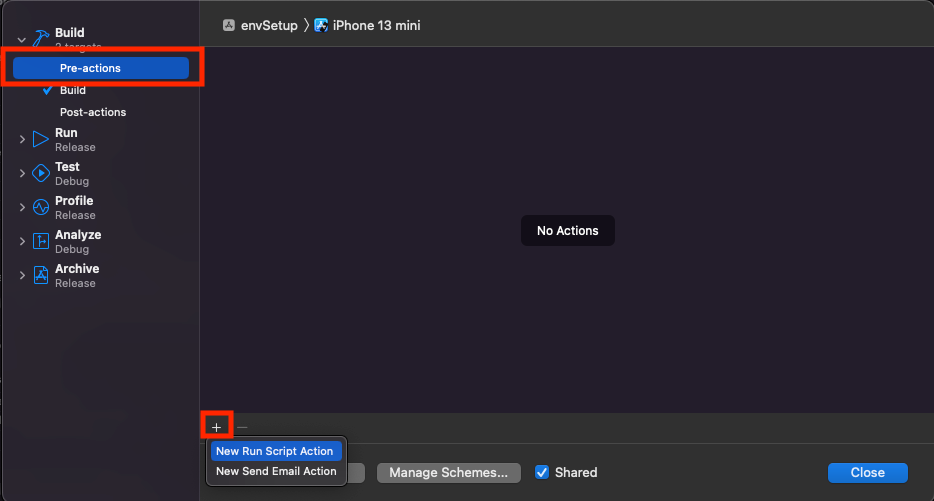
After the edit scheme, we must update podfile with all targets, Create def shared_pod for run use_native_modules!, use_react_native!().Shared_pod common for all targets.
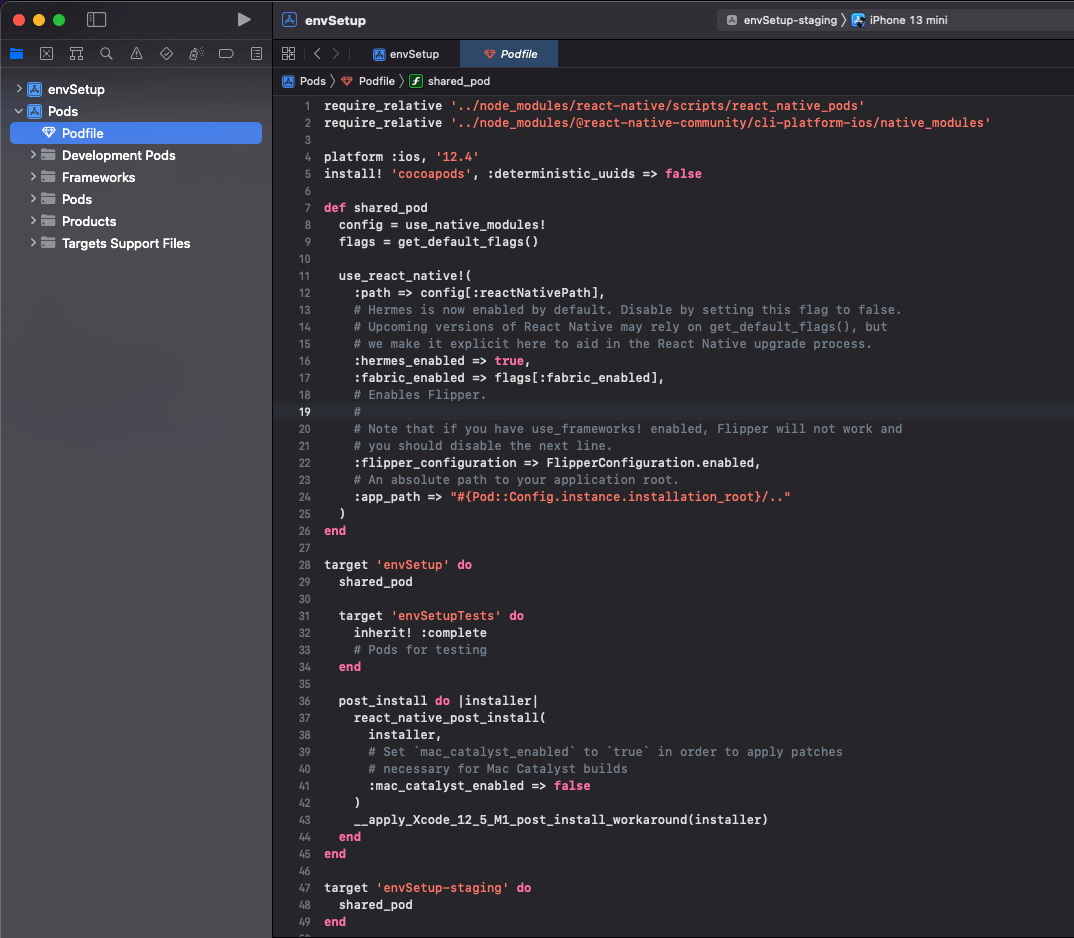
Run cmd in terminal
cd ios & pod installWe must add Script to execute the iOS project with build variations after Edit schemes. The script will be included inside the package.json file from the main project(envSetup).
"scripts": {
  "ios:prod": "react-native run-ios --scheme 'envSetup'",
  "ios:staging": "react-native run-ios --scheme 'envSetup-staging'"
}
Run Build:- (Android/iOS)
Ios Prod:-
npm run ios:prodIos Staging:-
npm run ios:stagingAndroid Prod:-
Debug
Debug
npm run android:prodRelease
npm run android:prod-releaseAndroid Staging:-
Debug
Debug
npm run android:stagingRelease
npm run android:staging-release
